Minka Lavery 9145-407 Installation Guide
Browse online or download Installation Guide for Unknown Minka Lavery 9145-407. Minka Lavery 9145-407 Installation Guide User Manual
- Page / 1
- Table of contents
- BOOKMARKS
Summary of Contents
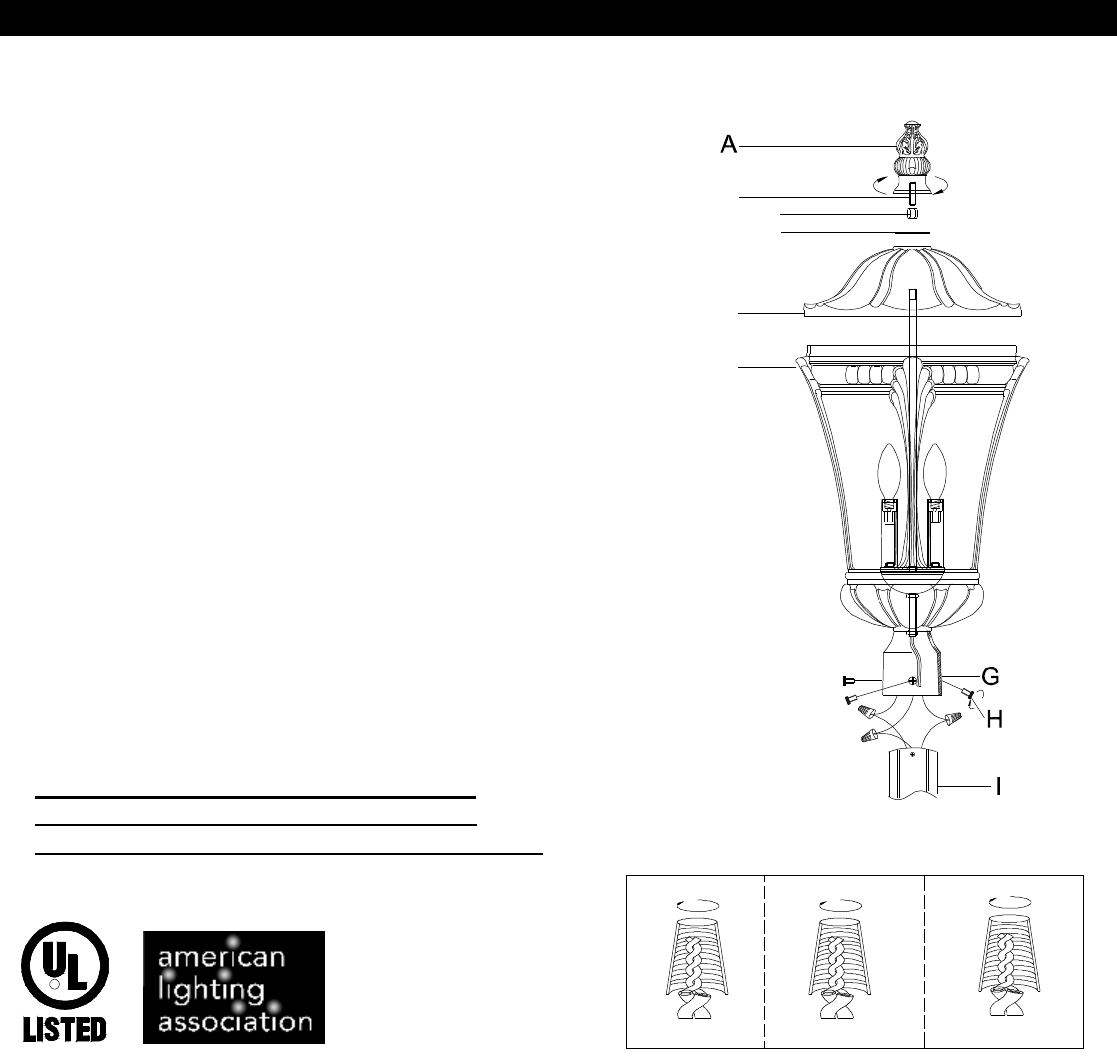
INSTALLATION INSTRUCTIONS Model # 9145 READ AND SAVE THESE INSTRUCTIONS WARNING! SHUT POWER OFF AT FUSE OR CIRCUIT BREAKER. 1. Shut off po
Related products and manuals for Unknown Minka Lavery 9145-407
 (1 pages)
 (1 pages)
© 2020, manymanuals.com. All rights reserved. | 0.710 s |
 Manymanuals.com
 Manymanuals.de
 Manymanuals.fr
 Manymanuals.it
 Manymanuals.pl
 Manymanuals.cz
 Manymanuals.es
 Manymanuals-pt.com
Comments to this Manuals